Introduction to Kentucky Bourbon Balls
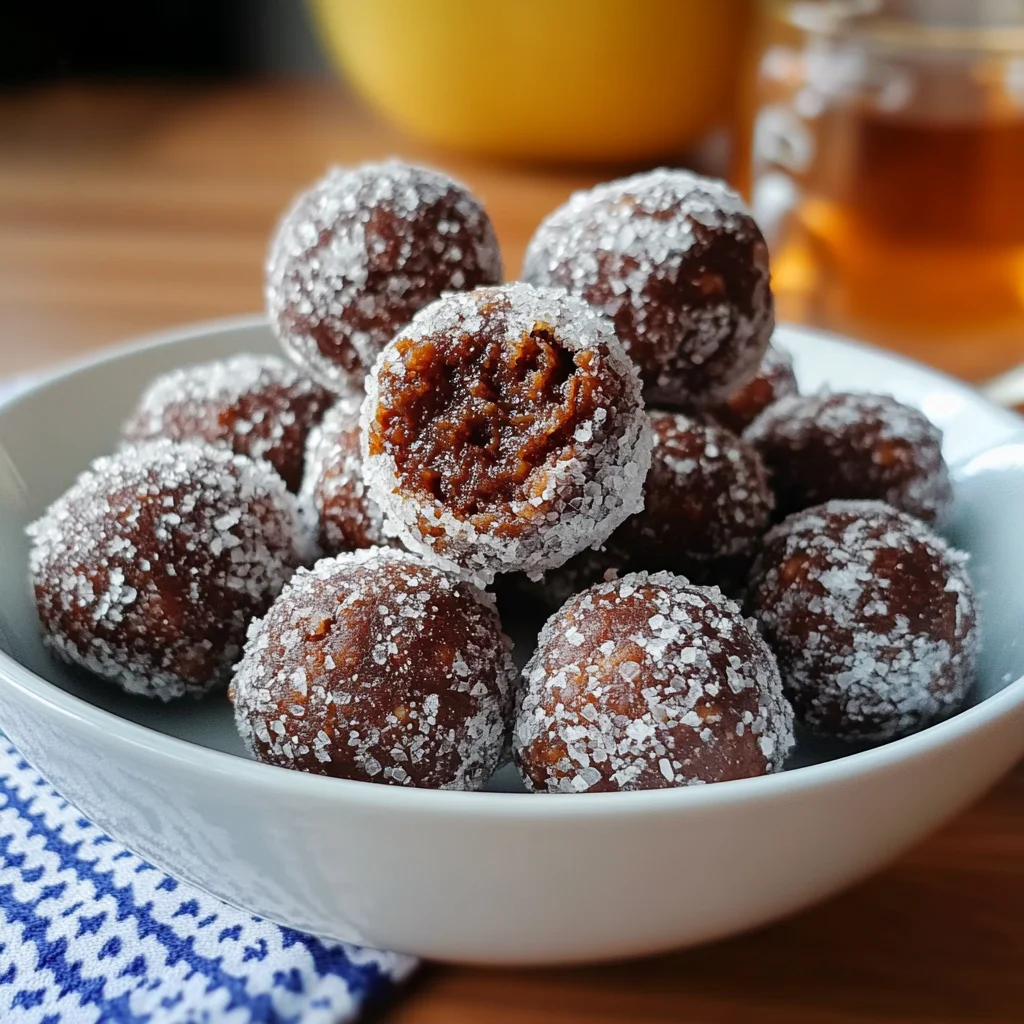
There’s something magical about the combination of chocolate and bourbon, especially when it comes to Kentucky Bourbon Balls. These delightful treats are not just a dessert; they’re a celebration of flavors that can brighten any occasion. Whether you’re looking to impress guests at a gathering or simply want a quick solution for a sweet craving, this recipe is your go-to. With minimal effort and no baking required, you can whip up a batch of these indulgent bites that are sure to leave everyone asking for more. Let’s dive into this delicious journey!
Why You’ll Love This Kentucky Bourbon Balls
These Kentucky Bourbon Balls are a dream come true for any home cook. They’re incredibly easy to make, requiring no baking at all. In just about an hour, you can create a batch of rich, chocolatey goodness that’s perfect for sharing—or keeping all to yourself! The delightful blend of flavors will have your taste buds dancing, making them a hit at any gathering or a sweet treat for a cozy night in.
Ingredients for Kentucky Bourbon Balls
Gathering the right ingredients is the first step to creating these delightful Kentucky Bourbon Balls. Here’s what you’ll need:
- Finely crushed vanilla wafers: These provide the base and a sweet crunch. You can substitute with graham crackers if needed.
- Powdered sugar: This adds sweetness and helps bind the mixture. Extra is great for rolling the finished balls.
- Chopped pecans or walnuts: Nuts add a lovely texture and flavor. Feel free to use your favorite nut or even omit them for a nut-free version.
- Unsweetened cocoa powder: This gives a rich chocolate flavor. Opt for Dutch-processed cocoa for a smoother taste.
- Kentucky bourbon: The star of the show! It infuses the balls with a warm, rich flavor. Any good-quality bourbon will do.
- Light corn syrup: This helps keep the mixture moist and sticky. Honey or maple syrup can be used as alternatives.
- Vanilla extract: A splash of this enhances the overall flavor. Use pure vanilla for the best results.
- Semi-sweet chocolate chips: These are melted to coat the balls, adding a luscious chocolate layer. Dark chocolate can be a great substitute.
- Vegetable shortening: This helps the chocolate melt smoothly. You can skip it if you prefer a richer chocolate coating.
For exact measurements, check the bottom of the article where you can find everything listed for easy printing!
How to Make Kentucky Bourbon Balls
Creating Kentucky Bourbon Balls is a straightforward process that’s as enjoyable as eating them. Follow these simple steps, and you’ll have a batch of these delightful treats ready in no time!
Step 1: Mix the Dry Ingredients
Start by grabbing a large mixing bowl. Combine the finely crushed vanilla wafers, powdered sugar, chopped nuts, and cocoa powder. Stir everything together until it’s well mixed. This dry blend is the foundation of your bourbon balls, so make sure it’s evenly combined for the best flavor.
Step 2: Add the Wet Ingredients
Next, it’s time to add the fun stuff! Pour in the Kentucky bourbon, light corn syrup, and vanilla extract. Mix until it forms a sticky dough. Don’t be afraid to get your hands in there; it’s the best way to ensure everything is well incorporated. The bourbon will give your mixture that signature kick!
Step 3: Chill the Mixture
Cover the bowl with plastic wrap and pop it in the refrigerator for about 30 minutes. Chilling the mixture makes it easier to roll into balls later. Plus, it allows the flavors to meld together beautifully. Trust me, this step is worth the wait!
Step 4: Form the Balls
Once chilled, take the mixture out of the fridge. Scoop about a tablespoon of the dough and roll it into a ball between your palms. Place each ball on a baking sheet lined with parchment paper. You can adjust the size based on your preference, but remember, these treats are rich!
Step 5: Melt the Chocolate
In a microwave-safe bowl, combine the semi-sweet chocolate chips and vegetable shortening. Microwave in 30-second intervals, stirring in between, until melted and smooth. This chocolate coating is what makes these bourbon balls irresistible, so take your time to get it just right.
Step 6: Coat the Balls
Now comes the fun part! Dip each bourbon ball into the melted chocolate, ensuring it’s fully coated. Use a fork to lift it out, letting any excess chocolate drip off. Place the coated balls back on the baking sheet. If you like, sprinkle a little extra powdered sugar on top for a finishing touch.
Step 7: Let Them Set
Finally, refrigerate the chocolate-coated bourbon balls for about 30 minutes to let the chocolate set. Once they’re firm, they’re ready to enjoy! Store any leftovers in an airtight container in the fridge, but I doubt they’ll last long!

Tips for Success
- Chill the mixture longer if it feels too sticky to roll.
- Use a cookie scoop for uniform ball sizes.
- Experiment with different nuts for unique flavors.
- For a boozy kick, let the balls sit for a day before serving.
- Keep your chocolate warm while coating to avoid clumping.
Equipment Needed
- Mixing bowl: A large bowl for combining ingredients. A sturdy plastic or glass bowl works well.
- Measuring cups: Essential for accurate ingredient portions. Use a kitchen scale for precision.
- Baking sheet: Line it with parchment paper for easy cleanup.
- Microwave-safe bowl: For melting chocolate; any heatproof bowl will do.
- Fork: Handy for dipping and coating the balls.
Variations
- Nut-Free Version: Omit the nuts or substitute with sunflower seeds for a similar crunch without allergens.
- Gluten-Free Option: Use gluten-free vanilla wafers or graham crackers to make these treats suitable for gluten-sensitive friends.
- Spiced Bourbon Balls: Add a pinch of cinnamon or nutmeg to the mixture for a warm, spiced flavor that complements the bourbon.
- Dark Chocolate Coating: Swap semi-sweet chocolate for dark chocolate for a richer, more intense chocolate experience.
- Maple Bourbon Balls: Replace Kentucky bourbon with maple bourbon for a unique twist that adds a hint of sweetness.
Serving Suggestions
- Pair with Coffee: Serve these bourbon balls alongside a rich cup of coffee for a delightful afternoon treat.
- Presentation: Arrange them on a decorative platter, dusted with powdered sugar for an elegant touch.
- Festive Drinks: Complement with a glass of bourbon or a sweet dessert wine for a perfect pairing.
- Gift Idea: Package them in a mason jar tied with a ribbon for a thoughtful homemade gift.
FAQs about Kentucky Bourbon Balls
As you embark on your journey to create these delightful Kentucky Bourbon Balls, you might have a few questions. Here are some common queries that can help you along the way:
Can I make Kentucky Bourbon Balls ahead of time?
Absolutely! These treats can be made a few days in advance. Just store them in an airtight container in the fridge. The flavors actually improve as they sit!
What type of bourbon should I use?
Any good-quality Kentucky bourbon will work wonders. Choose one that you enjoy sipping, as its flavor will shine through in the balls.
Can I freeze Kentucky Bourbon Balls?
Yes, you can freeze them! Just make sure they are well-wrapped in an airtight container. They can last up to three months in the freezer.
Are Kentucky Bourbon Balls suitable for kids?
While the alcohol content cooks off during the mixing process, there’s still a hint of bourbon flavor. If you prefer, you can substitute the bourbon with a non-alcoholic vanilla extract for a kid-friendly version.
How do I store leftover bourbon balls?
Store any leftovers in an airtight container in the fridge. They’ll stay fresh for about a week, but I doubt they’ll last that long!
Final Thoughts
Making Kentucky Bourbon Balls is more than just a cooking task; it’s an experience filled with joy and nostalgia. Each bite transports you to a cozy gathering, where laughter and good company abound. The rich chocolate, combined with the warmth of bourbon, creates a delightful treat that’s perfect for any occasion. Whether you’re sharing them with friends or savoring them solo, these little bites of happiness are sure to bring a smile to your face. So roll up your sleeves, embrace the process, and enjoy the sweet rewards of your culinary adventure!