Introduction to Homemade Peanut Butter Kiss Cookies
There’s something magical about the aroma of freshly baked cookies wafting through the house. It takes me back to my childhood, where the kitchen was a hub of laughter and sweet treats. Homemade Peanut Butter Kiss Cookies are not just a dessert; they’re a warm hug on a plate. This recipe is perfect for those busy days when you want to whip up something quick yet impressive. With just a handful of ingredients, you can create a delightful treat that will have your loved ones asking for seconds. Let’s dive into this delicious adventure!
Why You’ll Love This Homemade Peanut Butter Kiss Cookies
These Homemade Peanut Butter Kiss Cookies are a dream come true for any home cook. They’re incredibly easy to make, requiring minimal effort and time. In just 25 minutes, you can have a batch of warm, gooey cookies ready to impress. The combination of creamy peanut butter and chocolatey Hershey’s Kisses creates a flavor explosion that’s hard to resist. Perfect for sharing or indulging, these cookies are sure to become a favorite!
Ingredients for Homemade Peanut Butter Kiss Cookies
Gathering the right ingredients is the first step to cookie perfection. Here’s what you’ll need for these delightful Homemade Peanut Butter Kiss Cookies:
- Creamy Peanut Butter: The star of the show! It gives the cookies their rich flavor and chewy texture. Opt for a high-quality brand for the best results.
- Granulated Sugar: This sweetener adds the perfect amount of sweetness and helps create that lovely golden crust.
- Large Egg: Acts as a binder, bringing everything together while adding moisture to the dough.
- Vanilla Extract: A splash of this aromatic extract enhances the overall flavor, making each bite even more delightful.
- All-Purpose Flour: The backbone of the cookie dough, providing structure and stability.
- Baking Soda: This leavening agent helps the cookies rise slightly, giving them a light texture.
- Salt: Just a pinch balances the sweetness and enhances the flavors of the other ingredients.
- Hershey’s Kisses: The iconic chocolate topping that adds a sweet surprise in every bite. Feel free to use different flavors for a fun twist!
For those looking to mix things up, consider using crunchy peanut butter for added texture or swapping out the Hershey’s Kisses for other chocolate candies. You can find the exact measurements for each ingredient at the bottom of the article, ready for printing!
How to Make Homemade Peanut Butter Kiss Cookies
Creating these Homemade Peanut Butter Kiss Cookies is a straightforward process that anyone can master. Follow these simple steps, and you’ll be on your way to cookie bliss in no time!
Step 1: Preheat the Oven and Prepare the Baking Sheet
Start by preheating your oven to 350°F (175°C). This step is crucial because it ensures even baking. While the oven heats up, line a baking sheet with parchment paper. This prevents the cookies from sticking and makes cleanup a breeze. Trust me, your future self will thank you!
Step 2: Mix the Wet Ingredients
In a mixing bowl, combine the creamy peanut butter, granulated sugar, large egg, and vanilla extract. Use a sturdy spatula or a hand mixer to blend these ingredients until you achieve a smooth batter. The creamy peanut butter should be the star here, creating a luscious base for your cookies.
Step 3: Combine Dry Ingredients
In a separate bowl, whisk together the all-purpose flour, baking soda, and salt. This step is essential for evenly distributing the leavening agent and salt throughout the flour. Gradually add this dry mixture to the wet ingredients, stirring until everything is fully combined. You want a thick, cohesive dough that holds together nicely.
Step 4: Form the Cookie Dough
Now it’s time to portion out the dough. Using a small cookie scoop or your hands, roll the dough into balls about 1 inch in diameter. Place them on the prepared baking sheet, spacing them about 2 inches apart. This spacing allows the cookies to spread without merging into one giant cookie!
Step 5: Bake the Cookies
Slide the baking sheet into your preheated oven and bake for 8-10 minutes. Keep an eye on them! You’ll know they’re ready when the edges start to turn golden brown. The centers may look a bit soft, but they’ll firm up as they cool.
Step 6: Add the Hershey’s Kisses
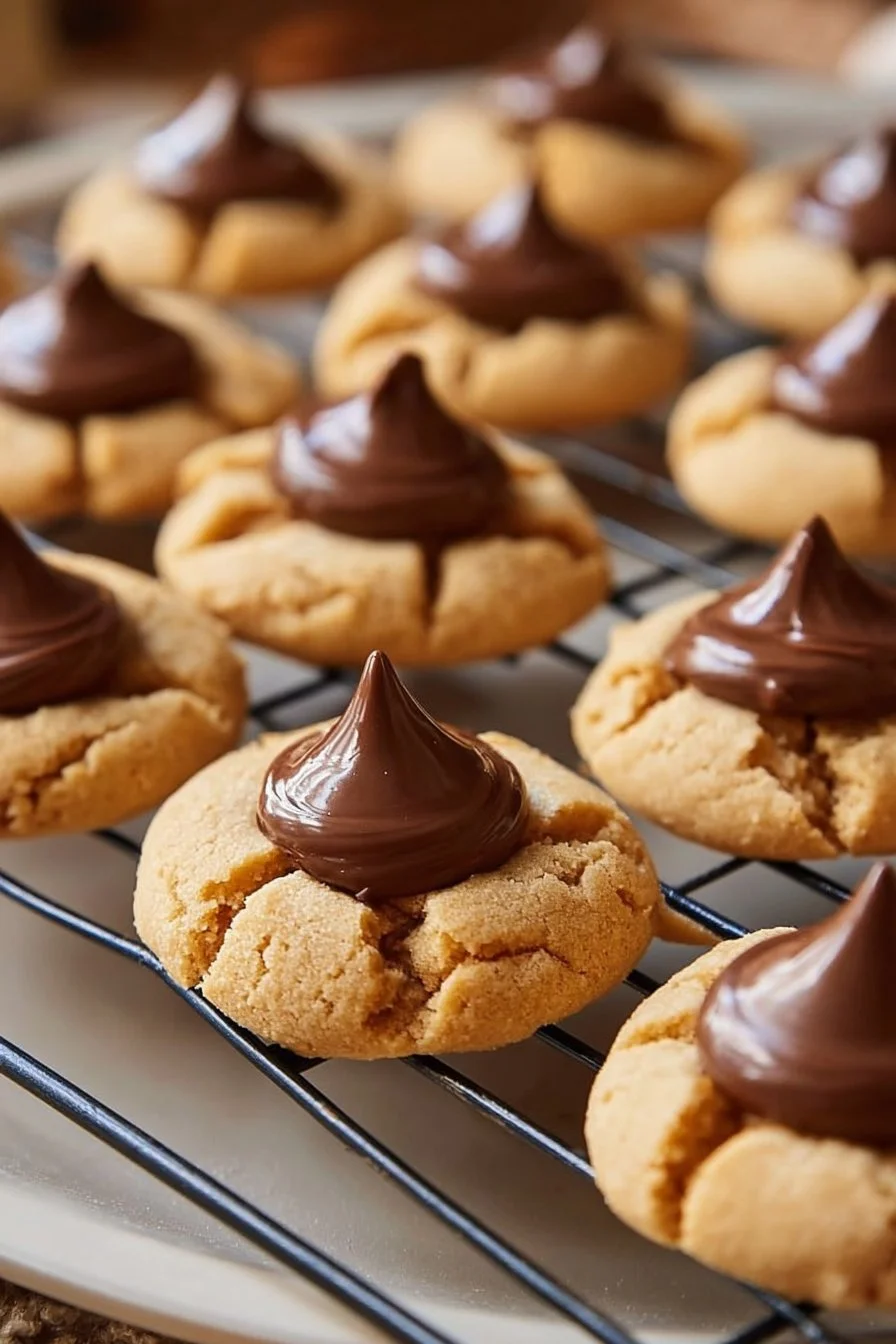
As soon as you pull the cookies from the oven, it’s time for the magic touch. Press a Hershey’s Kiss into the center of each cookie while they’re still warm. This creates that signature look and adds a delightful chocolate surprise in every bite!
Step 7: Cool the Cookies
Let the cookies cool on the baking sheet for a few minutes before transferring them to a wire rack. This cooling period is vital for achieving the perfect texture. If you move them too soon, they might crumble. Patience is key here!
Tips for Success
- Use room temperature ingredients for better mixing.
- Don’t overbake; cookies will continue to firm up as they cool.
- For a fun twist, try adding chocolate chips or chopped nuts to the dough.
- Keep an eye on the cookies during baking; every oven is different.
- Store cookies in an airtight container to maintain freshness.
Equipment Needed
- Baking Sheet: A standard baking sheet works well, but a silicone baking mat can be a great alternative for easy cleanup.
- Mixing Bowls: Use any size, but a large bowl is ideal for mixing the dough.
- Cookie Scoop: A small cookie scoop ensures uniform cookie sizes; however, your hands will do just fine!
- Parchment Paper: This helps prevent sticking; aluminum foil can be used in a pinch.
Variations
- Crunchy Peanut Butter: Swap creamy peanut butter for crunchy for added texture and a delightful bite.
- Dark Chocolate Kisses: Use dark chocolate Hershey’s Kisses for a richer flavor that pairs beautifully with peanut butter.
- Gluten-Free Option: Substitute all-purpose flour with a gluten-free blend to make these cookies suitable for gluten-sensitive friends.
- Nut-Free Version: Replace peanut butter with sunflower seed butter for a nut-free alternative that still delivers on taste.
- Mix-Ins: Add chocolate chips, butterscotch chips, or chopped nuts to the dough for extra flavor and texture.
Serving Suggestions
- Pair these cookies with a tall glass of cold milk for a classic treat.
- Serve alongside a scoop of vanilla ice cream for an indulgent dessert.
- For a festive touch, arrange cookies on a decorative platter with colorful sprinkles.
- Enjoy with a cup of coffee or tea for a cozy afternoon snack.
FAQs about Homemade Peanut Butter Kiss Cookies
Curious about these delightful Homemade Peanut Butter Kiss Cookies? Here are some common questions I often hear, along with answers to help you on your baking journey!
Can I use natural peanut butter for this recipe?
Absolutely! Just keep in mind that natural peanut butter can be a bit runnier. You might need to adjust the flour slightly to achieve the right dough consistency.
How should I store the cookies?
Store your cookies in an airtight container at room temperature. They’ll stay fresh for about a week. If you want to keep them longer, consider freezing them!
Can I make these cookies ahead of time?
Yes! You can prepare the dough in advance and refrigerate it for up to 3 days. Just roll the dough into balls and bake when you’re ready for fresh cookies!
What can I substitute for Hershey’s Kisses?
If you’re looking for a change, try using chocolate chips, caramel candies, or even mini Reese’s cups for a fun twist on the classic recipe!
Are these cookies suitable for a gluten-free diet?
Yes! Simply swap the all-purpose flour with a gluten-free flour blend, and you’ll have a delicious treat that everyone can enjoy!
Final Thoughts
Baking Homemade Peanut Butter Kiss Cookies is more than just a recipe; it’s an experience filled with warmth and nostalgia. The joy of mixing simple ingredients transforms into a delightful treat that brings smiles to faces young and old. Each bite is a perfect blend of creamy peanut butter and sweet chocolate, creating a moment of bliss. Whether you’re sharing them with family or enjoying them solo, these cookies are sure to become a cherished favorite. So, roll up your sleeves, embrace the process, and let the sweet aroma fill your home. Happy baking!
Get access to this and other recipe cards - free!
✓ Free membership — no credit card required