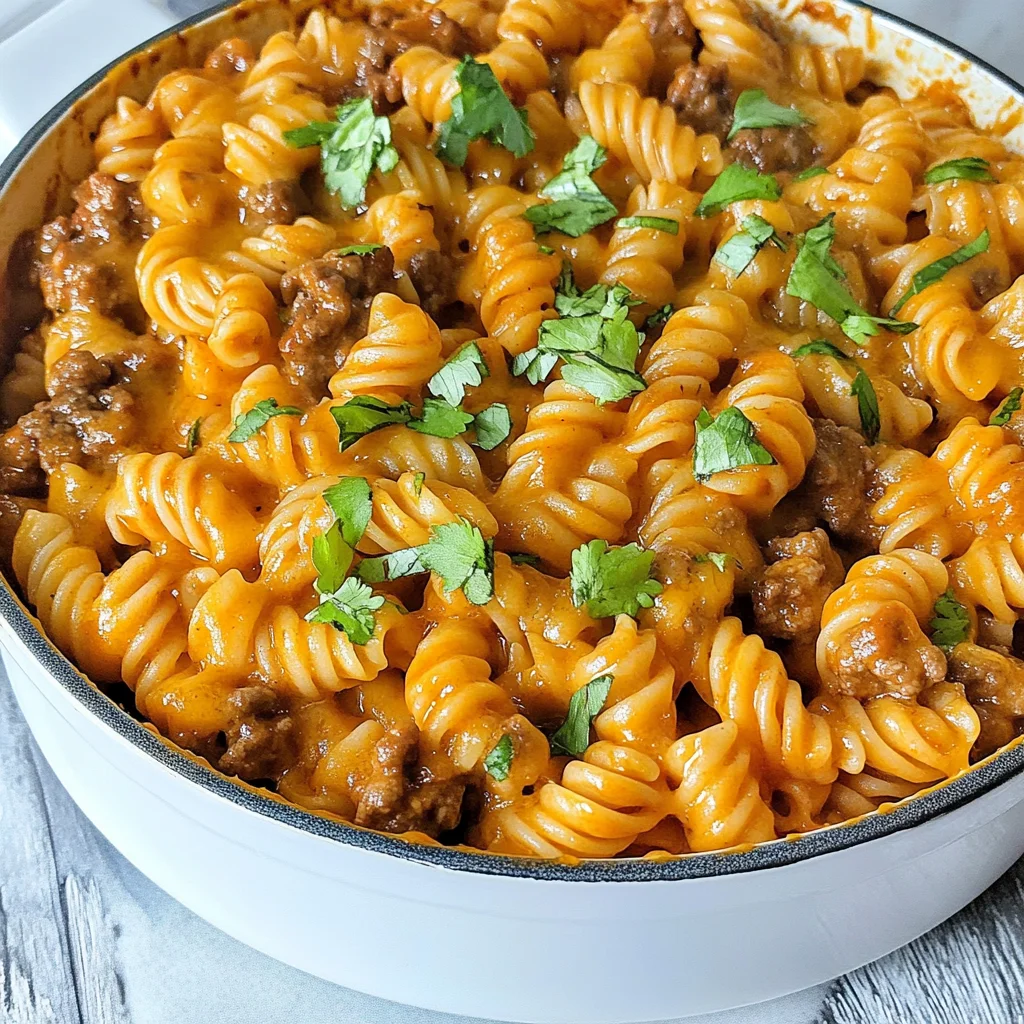
Introduction to Cheesy Taco Pasta
There’s something magical about a dish that brings the family together, and Cheesy Taco Pasta does just that. I remember the first time I made it; the aroma filled the kitchen, and my kids came running, eager to dig in. This recipe is a quick solution for those busy weeknights when you want to impress your loved ones without spending hours in the kitchen. With its creamy texture and bold taco flavors, it’s comfort food at its finest. Trust me, once you try this dish, it will become a staple in your home, just like it has in mine.
Why You’ll Love This Cheesy Taco Pasta
This Cheesy Taco Pasta is a game-changer for busy nights. It’s not just quick to whip up; it’s also a crowd-pleaser. The creamy, cheesy goodness combined with zesty taco flavors makes it irresistible. Plus, it’s a one-pot wonder, which means less cleanup for you. Whether you’re feeding a family or hosting friends, this dish delivers comfort and satisfaction in every bite. You’ll find yourself making it again and again!
Ingredients for Cheesy Taco Pasta
Gathering the right ingredients is the first step to creating this delightful dish. Here’s what you’ll need:
- Elbow macaroni: The classic pasta shape that holds onto the cheesy sauce perfectly.
- Ground beef or turkey: Choose your protein! Ground turkey is a leaner option, while beef adds rich flavor.
- Onion: Diced onion adds sweetness and depth to the dish.
- Garlic: Minced garlic brings a fragrant kick that elevates the overall taste.
- Taco seasoning: This is where the magic happens! It infuses the dish with that signature taco flavor.
- Diced tomatoes with green chilies: These add a zesty touch and a bit of heat.
- Beef broth or water: Use broth for extra flavor; water works in a pinch.
- Shredded cheddar cheese: A must for that gooey, cheesy goodness.
- Shredded Monterey Jack cheese: This cheese melts beautifully and adds creaminess.
- Sour cream: It adds a tangy richness that balances the flavors.
- Salt and pepper: Essential for seasoning to taste.
- Chopped green onions or cilantro: Optional garnishes that add freshness and color.
For those who like a little heat, consider adding jalapeños or a splash of hot sauce. You can find all the exact measurements at the bottom of the article, ready for printing!
How to Make Cheesy Taco Pasta
Now that you have all your ingredients ready, let’s dive into the steps to create this delicious Cheesy Taco Pasta. Each step is straightforward, making it easy for anyone to follow along. Let’s get cooking!
Step 1: Cook the Pasta
Start by boiling a large pot of salted water. Once it’s bubbling, add the elbow macaroni. Cook according to the package instructions until it’s al dente. This usually takes about 7-8 minutes. Drain the pasta and set it aside. Remember, you want it firm enough to hold up against the creamy sauce!
Step 2: Brown the Meat
In a large skillet over medium heat, add your ground beef or turkey. Break it up with a spatula as it cooks. You want it browned and no longer pink, which should take about 5-7 minutes. This step is crucial for building flavor, so don’t rush it!
Step 3: Sauté the Vegetables
Once the meat is browned, toss in the diced onion and minced garlic. Sauté them together for about 3-4 minutes until the onion becomes translucent. The aroma will be heavenly, and it’s the perfect time to get your family’s attention!
Step 4: Add Seasoning and Tomatoes
Now, sprinkle in the taco seasoning. Stir it well to coat the meat and vegetables. Next, pour in the can of diced tomatoes with green chilies and your choice of beef broth or water. Stir everything together and bring it to a gentle simmer for about 5 minutes. This allows the flavors to meld beautifully.
Step 5: Combine Pasta and Meat Mixture
Time to bring it all together! Add the cooked macaroni to the skillet. Stir until the pasta is well combined with the meat mixture. This is where the magic happens, and you’ll start to see the creamy goodness forming!
Step 6: Melt the Cheeses
Reduce the heat to low and add the shredded cheddar and Monterey Jack cheeses. Stir continuously until the cheeses melt and create a creamy sauce. This step is key to achieving that cheesy texture we all love. Don’t be shy—let it get nice and gooey!
Step 7: Finish with Sour Cream
Finally, fold in the sour cream. This adds a tangy richness that balances the flavors perfectly. Season with salt and pepper to taste. If you’re feeling adventurous, now’s the time to add jalapeños or hot sauce for an extra kick!
Tips for Success
- Always taste as you go! Adjust seasoning to your preference.
- For a creamier texture, add more sour cream or cheese.
- Don’t overcook the pasta; it should be al dente for the best bite.
- Feel free to mix in veggies like bell peppers or corn for added nutrition.
- Leftovers reheat well, making this a great meal prep option!
Equipment Needed
- Large pot: For boiling pasta. A Dutch oven works well too.
- Skillet: A non-stick skillet is ideal for browning meat and mixing ingredients.
- Colander: To drain the pasta. A slotted spoon can work in a pinch.
- Spatula: For stirring and breaking up the meat.
Variations
- Vegetarian Option: Swap the meat for black beans or lentils for a hearty, plant-based version.
- Spicy Kick: Add diced jalapeños or a splash of your favorite hot sauce to amp up the heat.
- Cheesy Delight: Experiment with different cheeses like pepper jack or gouda for a unique flavor twist.
- Gluten-Free: Use gluten-free pasta to make this dish suitable for those with dietary restrictions.
- Extra Veggies: Toss in some spinach, zucchini, or bell peppers for added nutrition and color.
Serving Suggestions
- Side Salad: A fresh green salad with a zesty vinaigrette pairs perfectly with the richness of the pasta.
- Garlic Bread: Serve warm garlic bread on the side for a delightful crunch.
- Drink Pairing: A cold beer or a refreshing iced tea complements the flavors beautifully.
- Presentation: Garnish with chopped green onions or cilantro for a pop of color.
FAQs about Cheesy Taco Pasta
As you embark on your Cheesy Taco Pasta journey, you might have a few questions. Here are some common queries that can help you along the way:
Can I make Cheesy Taco Pasta ahead of time?
Absolutely! You can prepare the dish in advance and store it in the refrigerator. Just reheat it on the stovetop or in the microwave when you’re ready to serve.
Is Cheesy Taco Pasta suitable for meal prep?
Yes! This dish is perfect for meal prep. It keeps well in the fridge for up to three days, making it a great option for quick lunches or dinners throughout the week.
Can I use a different type of pasta?
Definitely! While elbow macaroni is traditional, feel free to swap it for penne, rotini, or any pasta shape you prefer. Just adjust the cooking time as needed.
How can I make this dish spicier?
If you like a little heat, add diced jalapeños, a splash of hot sauce, or even some crushed red pepper flakes. Adjust to your taste for the perfect kick!
What can I serve with Cheesy Taco Pasta?
This dish pairs wonderfully with a fresh salad, garlic bread, or even some tortilla chips for added crunch. Enjoy experimenting with different sides!
Final Thoughts
Cooking Cheesy Taco Pasta is more than just preparing a meal; it’s about creating memories. The joy on my family’s faces as they dig into this creamy, cheesy delight is priceless. This dish has a way of bringing everyone together, sparking laughter and conversation around the table. It’s comforting, satisfying, and oh-so-easy to make, making it a go-to for busy nights. Whether you’re a seasoned chef or a kitchen novice, this recipe invites you to enjoy the simple pleasures of home-cooked food. I hope it becomes a cherished favorite in your home, just as it has in mine!