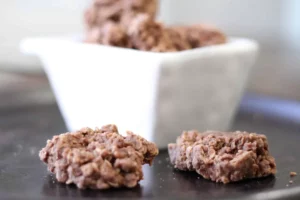
Introduction to Slice and Bake Cookies
There’s something magical about the aroma of freshly baked cookies wafting through the house. It takes me back to my childhood, where the kitchen was a hub of laughter and sweet treats. Slice and bake cookies are the perfect solution for those busy days when you crave a homemade dessert but don’t have hours to spare. With just a few simple steps, you can whip up a batch that’s sure to impress family and friends. Whether it’s a cozy night in or a gathering, these cookies are a delightful treat that brings everyone together.
Why You’ll Love This Slice and Bake Cookies
These slice and bake cookies are a game changer for anyone who loves a sweet treat but is short on time. They’re incredibly easy to make, requiring minimal effort for maximum flavor. Just roll, chill, slice, and bake! The result? Warm, gooey cookies that melt in your mouth. Plus, you can customize them with your favorite mix-ins, making them perfect for any occasion or craving. Who wouldn’t love that?
Ingredients for Slice and Bake Cookies
Gathering the right ingredients is the first step to cookie bliss. Here’s what you’ll need for these delightful slice and bake cookies:
- All-purpose flour: The backbone of any cookie, it gives structure and texture.
- Baking powder: This little leavening agent helps the cookies rise, making them light and fluffy.
- Salt: A pinch enhances the sweetness and balances flavors.
- Unsalted butter: Softened butter creates a rich, creamy base for the dough.
- Granulated sugar: Adds sweetness and helps achieve that perfect cookie crunch.
- Brown sugar: Brings moisture and a hint of caramel flavor, making cookies chewy.
- Vanilla extract: A must-have for that warm, comforting aroma and flavor.
- Large egg: Binds the ingredients together and adds richness.
- Semi-sweet chocolate chips: The star of the show! They melt beautifully and add a sweet surprise in every bite.
- Chopped nuts (optional): Walnuts or pecans add a delightful crunch and nutty flavor, but feel free to skip if you prefer a nut-free cookie.
For exact measurements, check the bottom of the article where you can find everything listed for easy printing. Happy baking!
How to Make Slice and Bake Cookies
Now that you have your ingredients ready, let’s dive into the fun part: making these delicious slice and bake cookies! Follow these simple steps, and you’ll be on your way to cookie heaven in no time.
Step 1: Preheat and Prepare
First things first, preheat your oven to 350°F (175°C). This ensures your cookies bake evenly. While the oven warms up, line your baking sheets with parchment paper. This little trick prevents sticking and makes cleanup a breeze.
Step 2: Mix Dry Ingredients
In a medium bowl, whisk together the all-purpose flour, baking powder, and salt. This step is crucial as it evenly distributes the leavening agent and salt throughout the flour. Set this mixture aside for now; it’ll be joining the party soon!
Step 3: Cream Butter and Sugars
In a large mixing bowl, cream together the softened unsalted butter, granulated sugar, and brown sugar. Use an electric mixer on medium speed for about 3 to 5 minutes until the mixture is light and fluffy. This step adds air to the dough, making your cookies tender and delightful.
Step 4: Combine Wet Ingredients
Next, add the vanilla extract and the large egg to the butter-sugar mixture. Mix until everything is well combined. The vanilla adds that warm, inviting aroma, while the egg helps bind the ingredients together.
Step 5: Combine Dry and Wet Mixtures
Gradually add the dry ingredients to the wet mixture. Stir gently until just combined. Be careful not to overmix; we want tender cookies, not tough ones! Now, fold in the semi-sweet chocolate chips and chopped nuts if you’re using them. This is where the magic happens—every bite will be a delightful surprise!
Step 6: Shape the Dough
Divide the dough in half and roll each half into a log about 2 inches in diameter. Wrap each log tightly in plastic wrap and chill in the refrigerator for at least 1 hour. Chilling the dough is essential for easy slicing and helps the cookies maintain their shape while baking.
Step 7: Slice and Bake
Once the dough is chilled, remove it from the fridge. Slice the logs into 1/4-inch thick rounds and place them on the prepared baking sheets. Bake for 10 to 12 minutes, or until the edges are golden brown. Let the cookies cool on the baking sheet for 5 minutes before transferring them to a wire rack to cool completely. Enjoy the sweet aroma filling your kitchen!
Tips for Success
- Don’t skip the chilling step; it’s key for easy slicing and perfect texture.
- Use a sharp knife for clean cuts; a dull knife can squish the dough.
- Experiment with mix-ins like dried fruit or different chocolate types for variety.
- Keep an eye on the cookies while baking; ovens can vary in temperature.
- Store cookies in an airtight container to maintain freshness.
Equipment Needed
- Baking sheets: Essential for baking; you can use any flat, oven-safe tray.
- Parchment paper: Prevents sticking; aluminum foil works in a pinch.
- Mixing bowls: A set of various sizes is handy; any large bowl will do.
- Electric mixer: For creaming butter and sugars; a whisk can work too.
- Plastic wrap: To wrap the dough; a reusable silicone bag is a great alternative.
Variations
- Nut-Free Option: Omit the chopped nuts for a classic cookie that’s safe for those with nut allergies.
- Gluten-Free Version: Substitute all-purpose flour with a gluten-free flour blend for a delicious alternative.
- Dark Chocolate Delight: Swap semi-sweet chocolate chips for dark chocolate chips for a richer flavor.
- Fruit-Infused Cookies: Add dried cranberries or raisins for a fruity twist that pairs beautifully with chocolate.
- Spiced Cookies: Incorporate a teaspoon of cinnamon or nutmeg for a warm, spiced flavor that’s perfect for fall.
Serving Suggestions
- Milk: A classic pairing! Serve your cookies with a cold glass of milk for a nostalgic treat.
- Coffee: Enjoy these cookies alongside a warm cup of coffee for a delightful afternoon pick-me-up.
- Presentation: Arrange cookies on a decorative platter, dust with powdered sugar, or drizzle with melted chocolate for an elegant touch.
- Ice Cream: Sandwich a cookie with your favorite ice cream for a delicious dessert twist.
FAQs about Slice and Bake Cookies
Got questions about slice and bake cookies? You’re not alone! Here are some common queries that might help you on your baking journey.
Can I freeze slice and bake cookie dough?
Absolutely! You can freeze the logs of dough before slicing. Just wrap them tightly in plastic wrap and then place them in a freezer bag. When you’re ready to bake, slice the frozen dough and add a couple of extra minutes to the baking time.
What can I use instead of chocolate chips?
If chocolate isn’t your thing, try using butterscotch chips, white chocolate, or even chunks of your favorite candy bars. The beauty of slice and bake cookies is their versatility!
How do I know when my cookies are done baking?
Look for golden brown edges! The centers may appear slightly soft, but they will firm up as they cool. Trust your instincts; a little underbaking can lead to a chewy texture.
Can I make these cookies without eggs?
Yes! You can substitute the egg with a flaxseed meal or applesauce. For one egg, mix 1 tablespoon of flaxseed meal with 2.5 tablespoons of water and let it sit for a few minutes. This will help bind the ingredients together.
How should I store my slice and bake cookies?
Store your cookies in an airtight container at room temperature for up to a week. If you want to keep them fresh longer, consider refrigerating them. Just make sure they’re well-sealed to prevent drying out!
Final Thoughts
There’s a certain joy that comes from baking slice and bake cookies. The simplicity of the process, combined with the delightful aroma filling your kitchen, creates a warm atmosphere that invites everyone in. Each bite is a reminder of cherished moments, whether shared with family or enjoyed solo with a cup of coffee. These cookies are not just a treat; they’re a way to connect, celebrate, and indulge in life’s little pleasures. So, roll up your sleeves, embrace the mess, and let the magic of baking bring a smile to your face and those around you!