Introduction to Lemon Pepper Chicken and Rotini
After a long day, the last thing I want is to spend hours in the kitchen. That’s where my go-to dish, Lemon Pepper Chicken and Rotini, comes into play. It’s a delightful blend of zesty chicken, tender pasta, and vibrant veggies that’s ready in just 35 minutes. This recipe is perfect for impressing your loved ones or simply treating yourself to a comforting meal. With its bright flavors and satisfying textures, it’s a quick solution for busy evenings or a cozy weekend dinner. Trust me, once you try it, you’ll be hooked!
Why You’ll Love This Lemon Pepper Chicken and Rotini
This Lemon Pepper Chicken and Rotini dish is a game-changer for anyone who craves flavor without the fuss. It’s quick to prepare, making it ideal for those hectic weeknights. The combination of zesty lemon, savory chicken, and fresh veggies creates a taste explosion that will leave your taste buds dancing. Plus, it’s a one-pan wonder, which means less cleanup and more time to enjoy your meal with family or friends.
Ingredients for Lemon Pepper Chicken and Rotini
Gathering the right ingredients is the first step to creating a delicious Lemon Pepper Chicken and Rotini. Here’s what you’ll need:
- Boneless, skinless chicken breasts: The star of the dish, providing lean protein and a juicy texture.
- Olive oil: This adds richness and helps to achieve that golden-brown crust on the chicken.
- Lemon pepper seasoning: A zesty blend that infuses the chicken with bright, citrusy flavor.
- Garlic powder: A must-have for that aromatic kick that elevates the dish.
- Salt and pepper: Essential for enhancing all the flavors in your meal.
- Rotini pasta: The perfect shape to hold onto the sauce and veggies, making every bite satisfying.
- Cherry tomatoes: These add a burst of sweetness and color, balancing the dish beautifully.
- Fresh spinach: A nutritious addition that wilts down nicely, adding a pop of green.
- Grated Parmesan cheese: This brings a creamy, salty finish that ties everything together.
- Juice of 1 lemon: Freshly squeezed juice brightens the dish and enhances the lemon flavor.
- Fresh parsley: A lovely garnish that adds a touch of freshness and color.
For those looking to mix things up, consider adding red pepper flakes for a spicy kick or substituting the chicken with shrimp or tofu for a different protein option. You can find all the exact quantities for these ingredients at the bottom of the article, ready for printing!
How to Make Lemon Pepper Chicken and Rotini
Now that you have all your ingredients ready, let’s dive into the cooking process. This Lemon Pepper Chicken and Rotini is not just a meal; it’s an experience. Follow these simple steps, and you’ll have a delicious dish on the table in no time!
Step 1: Cook the Rotini Pasta
Start by bringing a large pot of salted water to a rolling boil. The salt enhances the pasta’s flavor, so don’t skip this step! Once boiling, add the rotini pasta and cook according to the package instructions until it’s al dente—firm to the bite but not hard. This usually takes about 8-10 minutes. Remember to reserve about 1/2 cup of the pasta water before draining. This starchy water will help bind everything together later.
Step 2: Prepare the Chicken
While the pasta is cooking, it’s time to focus on the chicken. Pat the boneless, skinless chicken breasts dry with a paper towel. This helps achieve that golden-brown crust. Season both sides generously with lemon pepper seasoning, garlic powder, salt, and pepper. Heat olive oil in a large skillet over medium-high heat. Once hot, add the chicken and cook for about 6-7 minutes on each side. You want it golden brown and cooked through, reaching an internal temperature of 165°F. Once done, remove the chicken from the skillet and let it rest for a few minutes before slicing it into strips.
Step 3: Sauté the Vegetables
In the same skillet, add the halved cherry tomatoes. Cook them for about 2-3 minutes until they soften and release their juices. Next, toss in the fresh spinach and cook until it wilts, which should take about a minute. The vibrant colors and aromas will fill your kitchen, making it hard to resist sneaking a taste!
Step 4: Combine Ingredients
Now it’s time to bring everything together. Add the cooked rotini to the skillet with the sautéed tomatoes and spinach. Pour in the reserved pasta water and the juice of one lemon. Toss everything together until well combined and heated through. The pasta will soak up all those delicious flavors, creating a mouthwatering dish.
Step 5: Serve the Dish
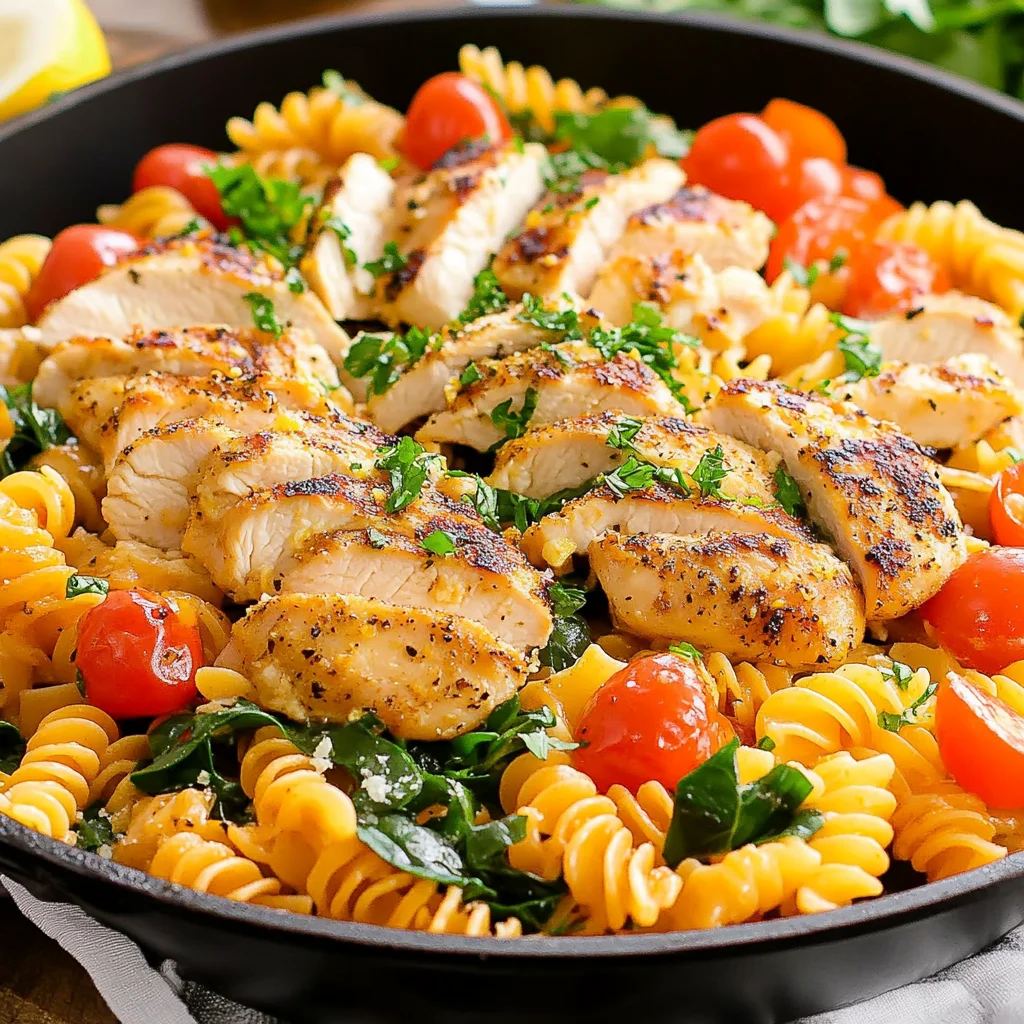
Finally, it’s time to plate up! Add the sliced chicken on top of the pasta mixture. Sprinkle generously with grated Parmesan cheese, allowing it to melt into the warm pasta. For a finishing touch, garnish with freshly chopped parsley. Serve hot, and watch as your family or friends dig in with delight!

Tips for Success
- Always taste as you go! Adjust seasoning to your preference.
- Don’t overcook the pasta; it should be al dente for the best texture.
- Let the chicken rest before slicing to keep it juicy.
- Use fresh ingredients for the best flavor, especially the lemon and spinach.
- For a creamier dish, add a splash of heavy cream before serving.
Equipment Needed
- Large pot: For boiling the rotini. A deep saucepan works too.
- Skillet: A non-stick skillet is ideal, but any large frying pan will do.
- Meat thermometer: To ensure chicken is cooked through. A knife can also check doneness.
- Colander: For draining pasta. A slotted spoon can be a handy alternative.
Variations
- Protein Swap: Substitute chicken with shrimp, tofu, or even grilled steak for a different flavor profile.
- Vegetable Medley: Add bell peppers, zucchini, or asparagus for extra color and nutrition.
- Herb Infusion: Experiment with fresh herbs like basil or thyme to elevate the dish’s aroma.
- Gluten-Free Option: Use gluten-free rotini pasta to make this dish suitable for gluten-sensitive diets.
- Spicy Kick: Incorporate red pepper flakes or diced jalapeños for those who enjoy a bit of heat.
Serving Suggestions
- Side Salad: Pair with a light arugula or mixed greens salad drizzled with balsamic vinaigrette.
- Garlic Bread: Serve with warm, crusty garlic bread for a comforting touch.
- Wine Pairing: A chilled Sauvignon Blanc complements the lemony flavors beautifully.
- Presentation: Serve in a large bowl, garnished with extra parsley and lemon wedges for a pop of color.
FAQs about Lemon Pepper Chicken and Rotini
Can I use other types of pasta for this recipe?
Absolutely! While rotini is perfect for holding onto the sauce, you can use penne, fusilli, or even spaghetti. Just adjust the cooking time according to the pasta type.
How can I make this dish healthier?
To lighten it up, consider using less olive oil or swapping out the chicken for grilled vegetables or a leaner protein like turkey. You can also add more spinach or other greens for extra nutrients.
Can I prepare Lemon Pepper Chicken and Rotini ahead of time?
Yes! You can cook the chicken and pasta in advance. Just store them separately in the fridge. When you’re ready to eat, reheat and combine with the sautéed vegetables.
What can I serve with Lemon Pepper Chicken and Rotini?
This dish pairs wonderfully with a fresh side salad or garlic bread. A light white wine, like Sauvignon Blanc, also complements the flavors beautifully.
Is this recipe suitable for meal prep?
Definitely! Lemon Pepper Chicken and Rotini is great for meal prep. Just portion it out in containers, and you’ll have delicious lunches or dinners ready to go!
Final Thoughts
Cooking Lemon Pepper Chicken and Rotini is more than just preparing a meal; it’s about creating moments. The bright flavors and comforting textures come together to make every bite a celebration. Whether you’re sharing it with family or enjoying a quiet dinner alone, this dish brings joy and satisfaction. It’s quick enough for a busy weeknight yet impressive enough for a special occasion. I hope this recipe becomes a staple in your kitchen, just as it has in mine. So grab your ingredients, roll up your sleeves, and let the deliciousness unfold!