

Introduction to Bolitas de Queso Crispy Fried Cheese Balls
There’s something magical about the sound of sizzling cheese balls in hot oil. Bolitas de Queso Crispy Fried Cheese Balls are not just a treat; they’re a celebration of flavor and crunch. Whether you’re hosting a game night or simply craving a snack, these little bites are the perfect solution. They come together quickly, making them ideal for busy days when you want to impress your loved ones without spending hours in the kitchen. Trust me, once you take that first bite, you’ll understand why these cheese balls are a must-try!
Why You’ll Love This Bolitas de Queso Crispy Fried Cheese Balls
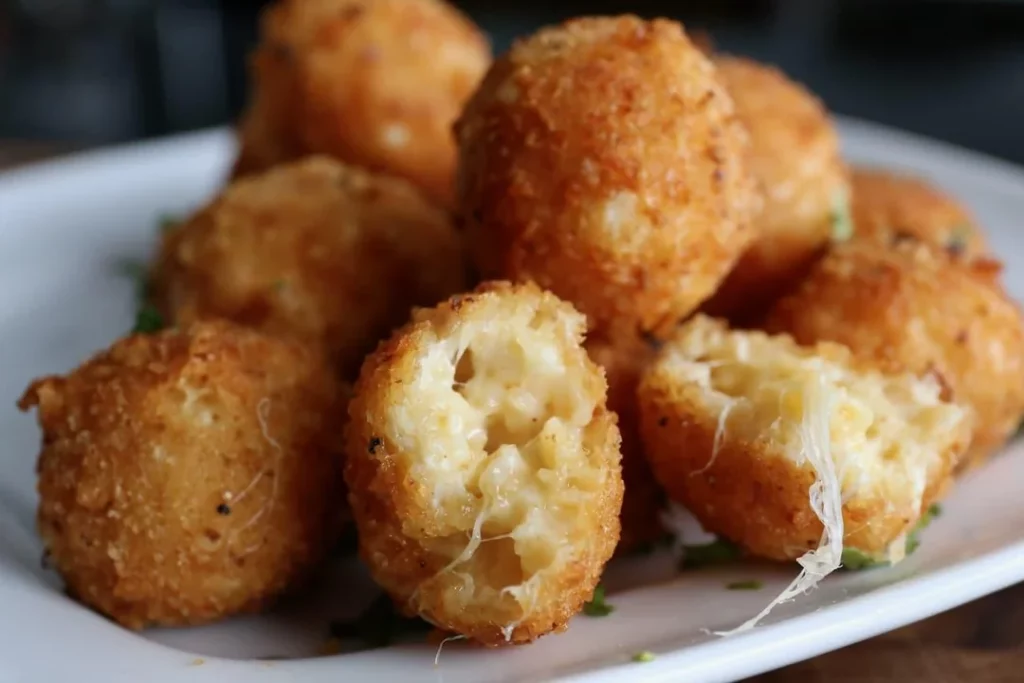
These Bolitas de Queso are a game-changer for any occasion. They’re incredibly easy to whip up, taking just 30 minutes from start to finish. The crispy exterior gives way to a gooey, cheesy center that’s simply irresistible. Plus, they’re versatile enough to pair with your favorite dipping sauces, making them a hit at parties or a cozy night in. Trust me, once you try them, you’ll be hooked!
Ingredients for Bolitas de Queso Crispy Fried Cheese Balls
Gathering the right ingredients is key to making these delicious Bolitas de Queso. Here’s what you’ll need:
- Shredded Cheese: Use a blend of mozzarella and cheddar for a perfect melt. Feel free to experiment with your favorite cheeses!
- All-Purpose Flour: This helps create a nice coating for the cheese balls, giving them that crispy texture.
- Breadcrumbs: Panko breadcrumbs are ideal for extra crunch, but regular breadcrumbs work too. They add a delightful crunch to the outside.
- Eggs: Beaten eggs act as a binder, helping the breadcrumbs stick to the cheese balls.
- Garlic Powder: A pinch of garlic powder adds a subtle flavor that elevates the cheese balls.
- Onion Powder: This enhances the overall taste, giving a savory depth to each bite.
- Paprika: Adds a hint of smokiness and a beautiful color to the coating.
- Salt and Black Pepper: Essential for seasoning, these enhance the flavors of the cheese and spices.
- Vegetable Oil: For frying, choose a neutral oil with a high smoke point, like canola or peanut oil.
- Fresh Parsley: Optional, but a sprinkle of chopped parsley adds a pop of color and freshness when serving.
For exact measurements, check the bottom of the article where you can find everything listed for easy printing. Happy cooking!
How to Make Bolitas de Queso Crispy Fried Cheese Balls
Making Bolitas de Queso is a straightforward process that’s as fun as it is delicious. Follow these simple steps, and you’ll have a plate of crispy fried cheese balls ready to impress your friends and family. Let’s dive in!
Step 1: Prepare Your Breading Station
Start by setting up your breading station. Grab three shallow bowls. In the first, add all-purpose flour. In the second, beat the eggs until smooth. In the third, mix breadcrumbs with garlic powder, onion powder, paprika, salt, and pepper. This organization is key! It makes the breading process quick and efficient, so you won’t feel like you’re juggling too many things at once.
Step 2: Shape the Cheese Balls
Now, it’s time to shape the cheese. Take a handful of shredded cheese—about a tablespoon’s worth—and roll it into a ball. Aim for a size that’s about the diameter of a golf ball. This size ensures they cook evenly and gives you that perfect gooey center. Repeat until you’ve shaped all the cheese into balls. You should have around 12 to 15 cheese balls ready to go!
Step 3: Breading the Cheese Balls
Next, it’s time to coat those cheese balls. Start by rolling each ball in the flour, shaking off any excess. Then, dip it into the beaten eggs, ensuring it’s fully coated. Finally, roll it in the breadcrumb mixture, pressing gently to help the crumbs stick. This three-step process creates a deliciously crispy exterior that contrasts beautifully with the melty cheese inside.
Step 4: Frying the Cheese Balls
Heat about 2 inches of vegetable oil in a deep skillet or pot over medium heat. To check if the oil is ready, drop in a small piece of bread. If it sizzles and bubbles, you’re good to go! Carefully add a few cheese balls to the hot oil, making sure not to overcrowd the pan. Fry them for about 2-3 minutes, turning occasionally until they’re golden brown and crispy. Keep an eye on them; nobody likes burnt cheese!
Step 5: Draining and Serving
Once your cheese balls are perfectly fried, use a slotted spoon to remove them from the oil. Place them on a paper towel-lined plate to drain any excess oil. This step is crucial for keeping them crispy! Serve your Bolitas de Queso hot, garnished with fresh parsley if you like. Pair them with your favorite dipping sauce, and watch them disappear!
Tips for Success
- Use a mix of cheeses for a richer flavor; mozzarella and cheddar work wonders together.
- Keep your hands wet while shaping the cheese balls to prevent sticking.
- Fry in small batches to maintain oil temperature and ensure even cooking.
- Let the cheese balls cool slightly before serving; they’ll be easier to handle.
- Experiment with different spices in the breadcrumb mixture for unique flavors!
Equipment Needed
- Deep Skillet or Pot: A heavy-bottomed pot works well if you don’t have a deep skillet.
- Three Shallow Bowls: Any shallow dishes will do for the breading station.
- Slotted Spoon: A regular spoon can work, but a slotted one helps drain excess oil.
- Paper Towels: Essential for draining the fried cheese balls.
Variations
- Spicy Kick: Add a pinch of cayenne pepper or chopped jalapeños to the cheese mixture for a spicy twist.
- Herbed Delight: Mix in fresh herbs like basil or oregano into the cheese for an aromatic flavor boost.
- Gluten-Free Option: Substitute all-purpose flour and breadcrumbs with gluten-free alternatives to accommodate dietary needs.
- Cheesy Blend: Experiment with different cheese combinations, such as pepper jack for a zesty flavor or feta for a tangy touch.
- Vegetable Add-ins: Incorporate finely chopped spinach or roasted red peppers into the cheese mixture for added nutrition and flavor.
Serving Suggestions
- Dipping Sauces: Serve with marinara, ranch, or spicy aioli for a flavor explosion.
- Fresh Veggies: Pair with a side of crunchy carrot and celery sticks for a refreshing contrast.
- Presentation: Arrange on a colorful platter, garnished with parsley for a pop of color.
- Drinks: Enjoy with a cold beer or a zesty margarita to complement the flavors.
FAQs about Bolitas de Queso Crispy Fried Cheese Balls
Can I make Bolitas de Queso in advance?
Absolutely! You can prepare the cheese balls ahead of time and refrigerate them. Just bread them and store them in an airtight container. When you’re ready to fry, take them out and let them sit at room temperature for about 15 minutes before cooking.
What type of cheese works best for these cheese balls?
A blend of mozzarella and cheddar is my go-to for Bolitas de Queso. Mozzarella gives that gooey stretch, while cheddar adds a rich flavor. Feel free to mix in other cheeses like pepper jack for a spicy kick!
How do I keep the cheese balls from falling apart while frying?
To prevent your cheese balls from falling apart, make sure they are well-coated in flour, egg, and breadcrumbs. Also, avoid overcrowding the pan while frying, as this can lower the oil temperature and cause them to break apart.
Can I bake Bolitas de Queso instead of frying them?
Yes, you can bake them! Preheat your oven to 400°F (200°C) and place the breaded cheese balls on a baking sheet lined with parchment paper. Spray them lightly with cooking spray and bake for about 15-20 minutes, or until golden brown. They may not be as crispy as fried, but they’ll still be delicious!
What dipping sauces pair well with Bolitas de Queso?
These crispy fried cheese balls are fantastic with a variety of dipping sauces. Try marinara for a classic touch, ranch for a creamy contrast, or a spicy aioli for a zesty kick. The options are endless!
Final Thoughts
Creating Bolitas de Queso Crispy Fried Cheese Balls is more than just cooking; it’s about sharing joy and flavor with those you love. The moment you pull those golden, crispy bites from the oil, the anticipation builds. Each cheesy morsel is a little piece of happiness, perfect for gatherings or a cozy night in. Whether you’re dipping them in your favorite sauce or enjoying them plain, these cheese balls are bound to bring smiles. So, roll up your sleeves, gather your ingredients, and let the deliciousness unfold. Trust me, you’ll be making these again and again!
Get access to this and other recipe cards - free!
✓ Free membership — no credit card required
