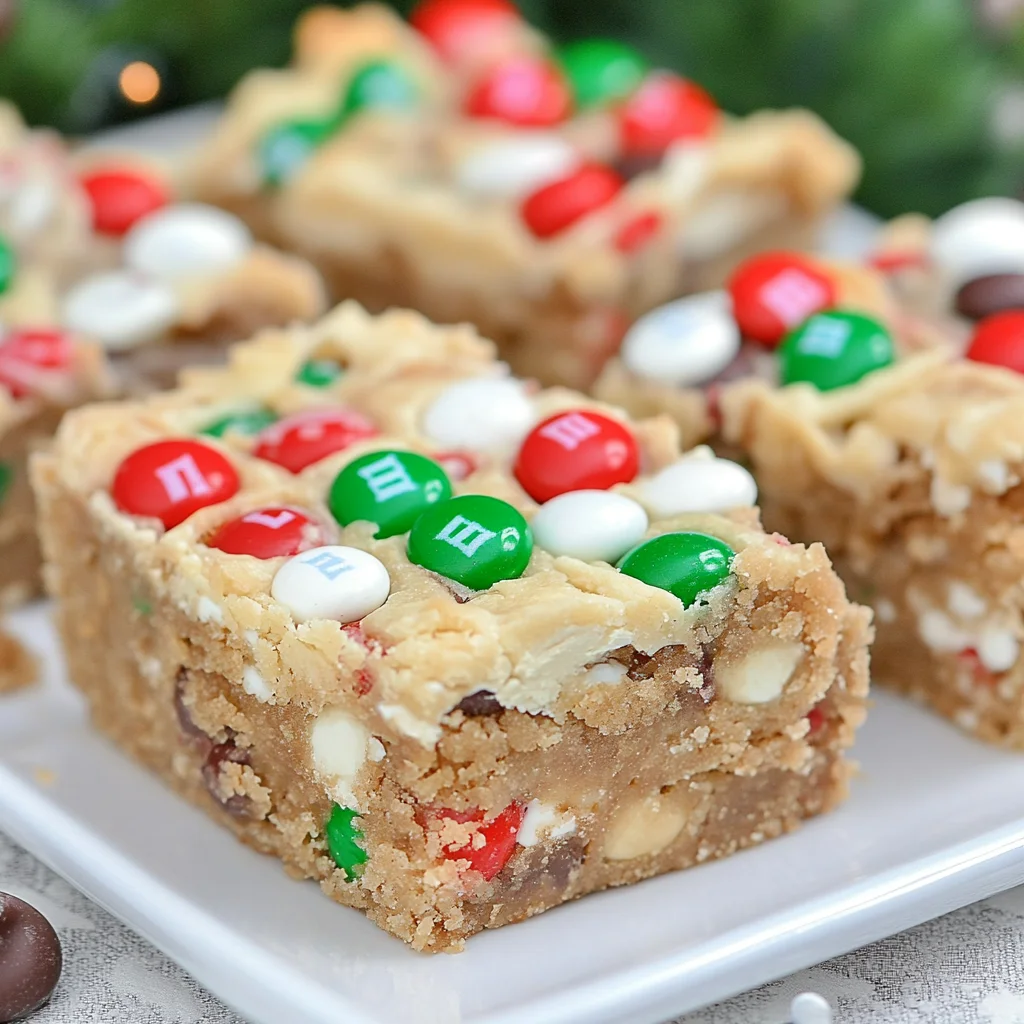
Introduction to Christmas M&M Cookie Bars
As the holiday season approaches, the air fills with the scent of pine and the sound of laughter. It’s a time for gathering, sharing stories, and, of course, indulging in sweet treats. That’s where my Christmas M&M cookie bars come in! These delightful bars are not just a quick solution for a busy day; they’re a festive centerpiece that will impress your loved ones. With vibrant red and green M&Ms, they capture the spirit of the season. Plus, they’re easy to whip up, making them perfect for holiday gatherings or cozy nights in.
Why You’ll Love This Christmas M&M Cookie Bars
These Christmas M&M cookie bars are a game-changer for the holiday season. They come together in just 45 minutes, making them a breeze for busy schedules. The combination of buttery goodness and colorful M&Ms creates a festive treat that’s hard to resist. Plus, they’re perfect for sharing at parties or cozy family gatherings. Trust me, one bite will have everyone asking for the recipe!
Ingredients for Christmas M&M Cookie Bars
Gathering the right ingredients is the first step to creating these festive Christmas M&M cookie bars. Here’s what you’ll need:
- Unsalted butter: This is the base of your cookie bars, providing richness and flavor. Make sure it’s softened for easy mixing.
- Brown sugar: Packed brown sugar adds moisture and a hint of caramel flavor, making your bars chewy and delicious.
- Granulated sugar: This sweetener balances the brown sugar and helps achieve that perfect cookie texture.
- Large eggs: Eggs bind the ingredients together and contribute to the overall structure of the bars.
- Vanilla extract: A splash of vanilla enhances the sweetness and adds a warm, inviting aroma.
- All-purpose flour: The main dry ingredient that gives your cookie bars their structure. It’s essential for that classic cookie texture.
- Baking soda: This leavening agent helps the bars rise and become fluffy, ensuring they’re not too dense.
- Salt: A pinch of salt enhances the flavors and balances the sweetness of the sugars.
- Holiday-themed M&M candies: These colorful candies are the star of the show, adding festive flair and a delightful crunch.
- Chocolate chips (optional): For those who can’t get enough chocolate, adding chocolate chips takes these bars to the next level.
For exact measurements, check the bottom of the article where you can find everything listed for easy printing. Happy baking!
How to Make Christmas M&M Cookie Bars
Creating these Christmas M&M cookie bars is a delightful journey that fills your kitchen with warmth and sweetness. Follow these simple steps, and you’ll have a festive treat ready in no time!
Step 1: Preheat the Oven
First things first, preheat your oven to 350°F (175°C). This ensures your cookie bars bake evenly. While the oven warms up, prepare your baking dish. Grease a 9×13-inch dish or line it with parchment paper for easy removal later.
Step 2: Cream the Butter and Sugars
In a large mixing bowl, combine the softened unsalted butter, packed brown sugar, and granulated sugar. Using a hand mixer or a sturdy spoon, cream them together until the mixture is light and fluffy. This should take about 2-3 minutes. The fluffiness is key to achieving that perfect texture!
Step 3: Add Eggs and Vanilla
Next, add the large eggs one at a time, mixing well after each addition. This helps incorporate air into the batter, making your cookie bars light. After the eggs, stir in the vanilla extract. The aroma will make your kitchen feel like a holiday wonderland!
Step 4: Combine Dry Ingredients
In a separate bowl, whisk together the all-purpose flour, baking soda, and salt. This step is crucial for even distribution of the leavening agent. Gradually add this dry mixture to your wet ingredients, stirring until just combined. Be careful not to overmix; we want soft and chewy cookie bars!
Step 5: Fold in M&Ms and Chocolate Chips
Now comes the fun part! Gently fold in the holiday-themed M&M candies and chocolate chips if you’re using them. The vibrant colors of the M&Ms will make your cookie bars look festive and inviting. Plus, who can resist that extra chocolatey goodness?
Step 6: Spread and Bake
Spread the cookie dough evenly into your prepared baking dish. Use a spatula to smooth the top. Bake in your preheated oven for 25-30 minutes. Keep an eye on them; you want the edges to be golden brown, while the center remains soft. A toothpick inserted should come out with a few moist crumbs.
Step 7: Cool and Serve
Once baked, let the cookie bars cool in the pan for 10-15 minutes. This helps them set up nicely. After that, transfer them to a wire rack to cool completely. Once cooled, slice them into squares and get ready to enjoy a festive treat that’s sure to bring smiles!

Tips for Success
- Use room temperature butter for easier creaming and a better texture.
- Don’t overmix the dough; it can lead to tough cookie bars.
- Check for doneness a few minutes early to avoid dry bars.
- Let the bars cool completely before slicing for cleaner edges.
- Store leftovers in an airtight container to keep them fresh.
Equipment Needed
- Mixing bowls: A large bowl for mixing and a smaller one for dry ingredients. Any size will do!
- Hand mixer or whisk: A hand mixer makes it easier, but a whisk works just as well.
- Baking dish: A 9×13-inch dish is ideal, but you can use any similar-sized pan.
- Spatula: For spreading the dough and serving the bars.
- Wire rack: Helps cool the bars evenly; a plate can work in a pinch.
Variations
- Nutty Delight: Add 1 cup of chopped nuts, like walnuts or pecans, for a crunchy texture.
- Gluten-Free Option: Substitute all-purpose flour with a gluten-free flour blend for a delicious alternative.
- Minty Twist: Use mint-flavored M&Ms or add a teaspoon of peppermint extract for a refreshing holiday flavor.
- White Chocolate Version: Swap out regular chocolate chips for white chocolate chips for a sweeter treat.
- Fruit Infusion: Mix in 1/2 cup of dried cranberries or cherries for a fruity burst in every bite.
Serving Suggestions
- Pair these cookie bars with a glass of cold milk for a classic treat.
- Serve warm with a scoop of vanilla ice cream on top for an indulgent dessert.
- Present them on a festive platter, garnished with fresh mint leaves.
- For a holiday twist, enjoy with a cup of spiced hot cocoa.
FAQs about Christmas M&M Cookie Bars
Can I make these Christmas M&M cookie bars ahead of time?
Absolutely! You can prepare the dough a day in advance and store it in the fridge. Just remember to let it sit at room temperature for a bit before baking. This way, you’ll have fresh cookie bars ready to go when you need them!
What can I substitute for M&Ms?
If you’re not a fan of M&Ms, feel free to swap them out for other candies like chocolate chunks, peanut butter chips, or even seasonal sprinkles. The key is to keep that festive spirit alive!
How should I store leftover cookie bars?
To keep your cookie bars fresh, store them in an airtight container at room temperature. They’ll stay delicious for several days. If you want to keep them longer, you can freeze them for up to three months!
Can I use a different type of flour?
Yes! If you need a gluten-free option, you can use a gluten-free flour blend. Just make sure it’s a 1:1 substitute to maintain the right texture in your Christmas M&M cookie bars.
What’s the best way to cut these cookie bars?
For clean cuts, let the bars cool completely before slicing. Use a sharp knife and wipe it clean between cuts for neat squares. This way, your cookie bars will look as good as they taste!
Final Thoughts
Creating these Christmas M&M cookie bars is more than just baking; it’s about crafting memories. The joy of mixing ingredients, the aroma wafting through your home, and the smiles on your loved ones’ faces as they take that first bite are priceless. These bars are a celebration of the season, bringing together flavors and colors that embody holiday cheer. Whether you’re sharing them at a gathering or enjoying them with a cozy cup of cocoa, each bite is a reminder of the warmth and joy that the holidays bring. Happy baking, and may your season be sweet!
