Introduction to 3-ingredient Oreo Fudge
There’s something magical about a dessert that requires just three ingredients. The 3-ingredient Oreo Fudge is one of those delightful treats that can turn an ordinary day into something special. Whether you’re looking for a quick solution for a busy afternoon or a sweet surprise to impress your loved ones, this fudge is your answer. It’s simple, satisfying, and oh-so-delicious! Plus, it’s a no-bake recipe, which means less time in the kitchen and more time enjoying the sweet rewards. Let’s dive into this easy and fun treat that everyone will love!
Why You’ll Love This 3-ingredient Oreo Fudge
This 3-ingredient Oreo Fudge is a game-changer for anyone who loves sweets but hates complicated recipes. It’s incredibly easy to whip up, taking just minutes to prepare. The rich, creamy texture combined with the crunch of Oreo cookies creates a flavor explosion that’s hard to resist. Plus, it’s perfect for any occasion—be it a last-minute gathering or a cozy night in. You’ll be the hero of dessert time!
Ingredients for 3-ingredient Oreo Fudge
Gathering the right ingredients is the first step to creating this delightful 3-ingredient Oreo Fudge. Here’s what you’ll need:
- Sweetened Condensed Milk: This creamy base adds sweetness and a luscious texture to the fudge. It’s the secret ingredient that binds everything together.
- White Chocolate Chips: These little morsels melt beautifully, creating a smooth and rich fudge. You can also use milk chocolate chips if you prefer a different flavor.
- Oreo Cookies: The star of the show! These iconic cookies bring a delightful crunch and chocolatey flavor. You’ll crush most of them into the fudge, but save a few for decoration on top.
Feel free to get creative! You can swap out the white chocolate for dark chocolate for a richer taste or add a pinch of sea salt for a sweet-salty twist. For exact measurements, check the bottom of the article where you can find everything available for printing.
How to Make 3-ingredient Oreo Fudge
Making 3-ingredient Oreo Fudge is a breeze! Follow these simple steps, and you’ll have a delicious treat ready in no time. Let’s get started!
Step 1: Prepare the Baking Pan
First things first, grab an 8×8-inch baking pan. Line it with parchment paper, leaving some paper hanging over the edges. This little trick will make it super easy to lift the fudge out later. Trust me, you’ll thank yourself!
Step 2: Crush the Oreo Cookies
Next, take 20 Oreo cookies and toss them into a ziplock bag. Seal it up tight, then grab a rolling pin. Crush those cookies until they’re a mix of fine crumbs and small chunks. The texture adds a delightful crunch to your fudge!
Step 3: Melt the Chocolate Mixture
In a saucepan, combine the sweetened condensed milk and white chocolate chips. Heat over low heat, stirring constantly. You want everything to melt together into a smooth, creamy mixture. Be patient; this part is crucial for that perfect fudge consistency!
Step 4: Combine and Mix
Once your chocolate mixture is melted and smooth, remove it from the heat. Stir in the crushed Oreo cookies until they’re evenly distributed. The chocolate and cookies should blend beautifully, creating a rich, decadent mixture.
Step 5: Transfer and Decorate
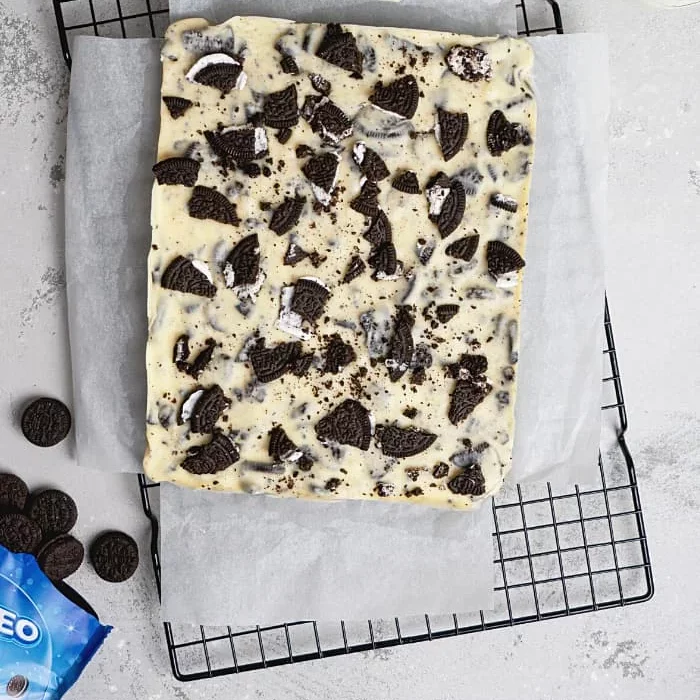
Now, pour the fudge mixture into your prepared baking pan. Spread it out evenly with a spatula. Don’t forget to sprinkle the remaining 4 broken Oreo cookies on top for that extra flair. It’s all about presentation!
Step 6: Refrigerate to Set
Cover the pan with plastic wrap and pop it in the refrigerator. Let it chill for about 1-2 hours. This step is essential for the fudge to set properly. The longer you wait, the better it will be!
Step 7: Cut and Serve
Once the fudge is set, remove it from the fridge. Lift it out of the pan using the parchment paper. Cut it into squares, and voilà! You’ve got yourself a batch of delicious 3-ingredient Oreo Fudge. Enjoy every bite!
Tips for Success
- Use fresh Oreo cookies for the best flavor and texture.
- Make sure to stir the chocolate mixture constantly to prevent burning.
- For a smoother fudge, let the mixture cool slightly before pouring it into the pan.
- Don’t rush the refrigeration process; patience is key for perfect fudge.
- Experiment with toppings like crushed nuts or drizzled chocolate for added flair!
Equipment Needed
- Baking Pan: An 8×8-inch pan works best, but any similar-sized dish will do.
- Parchment Paper: Essential for easy removal; aluminum foil can be a substitute.
- Ziplock Bag: For crushing cookies; a bowl and rolling pin can also work.
- Saucepan: A medium-sized one is perfect for melting the chocolate mixture.
- Spatula: Use it to spread the fudge evenly; a spoon can work in a pinch.
Variations
- Dark Chocolate Fudge: Swap white chocolate chips for dark chocolate chips for a richer flavor.
- Mint Oreo Fudge: Use Mint Oreo cookies instead of regular ones for a refreshing twist.
- Nutty Delight: Add chopped nuts like walnuts or pecans for an extra crunch.
- Peanut Butter Swirl: Mix in a few tablespoons of creamy peanut butter for a deliciously nutty flavor.
- Gluten-Free Option: Use gluten-free Oreo cookies to make this treat suitable for gluten-sensitive friends.
Serving Suggestions
- Pair with Coffee: A cup of strong coffee complements the sweetness of the fudge perfectly.
- Ice Cream Delight: Serve alongside a scoop of vanilla ice cream for a decadent dessert.
- Presentation: Arrange fudge squares on a decorative platter and sprinkle with crushed Oreos for a stunning display.
- Gift Idea: Wrap fudge squares in cellophane and tie with a ribbon for a thoughtful homemade gift.
FAQs about 3-ingredient Oreo Fudge
Can I use different types of chocolate chips?
Absolutely! While this 3-ingredient Oreo Fudge recipe calls for white chocolate chips, you can easily swap them for milk or dark chocolate chips. Each variation brings its own unique flavor to the fudge.
How long does the fudge last in the fridge?
This fudge can last up to a week in the refrigerator when stored in an airtight container. Just make sure to keep it covered to maintain its freshness!
Can I freeze the fudge?
Yes, you can freeze the fudge! Just cut it into squares, wrap them tightly in plastic wrap, and place them in a freezer-safe container. They’ll stay good for about 2-3 months. Thaw in the fridge before serving.
What can I do if my fudge doesn’t set properly?
If your fudge doesn’t set, it might need more time in the fridge. If it’s still soft after a few hours, try placing it in the freezer for a short time. Just be careful not to freeze it solid!
Can I add other mix-ins to the fudge?
Definitely! Feel free to get creative. You can add mini marshmallows, chocolate chunks, or even sprinkles for a fun twist. Just remember to keep the overall balance of ingredients in mind!
Final Thoughts
Creating 3-ingredient Oreo Fudge is more than just whipping up a quick dessert; it’s about the joy of sharing something sweet with those you love. The simplicity of this recipe allows you to focus on what truly matters—enjoying the moment. Each bite is a delightful blend of creamy chocolate and crunchy Oreos, evoking memories of childhood treats and carefree days. Whether you’re celebrating a special occasion or just treating yourself, this fudge is sure to bring smiles. So, roll up your sleeves, gather your ingredients, and let the sweet magic unfold in your kitchen!
Get access to this and other recipe cards - free!
✓ Free membership — no credit card required