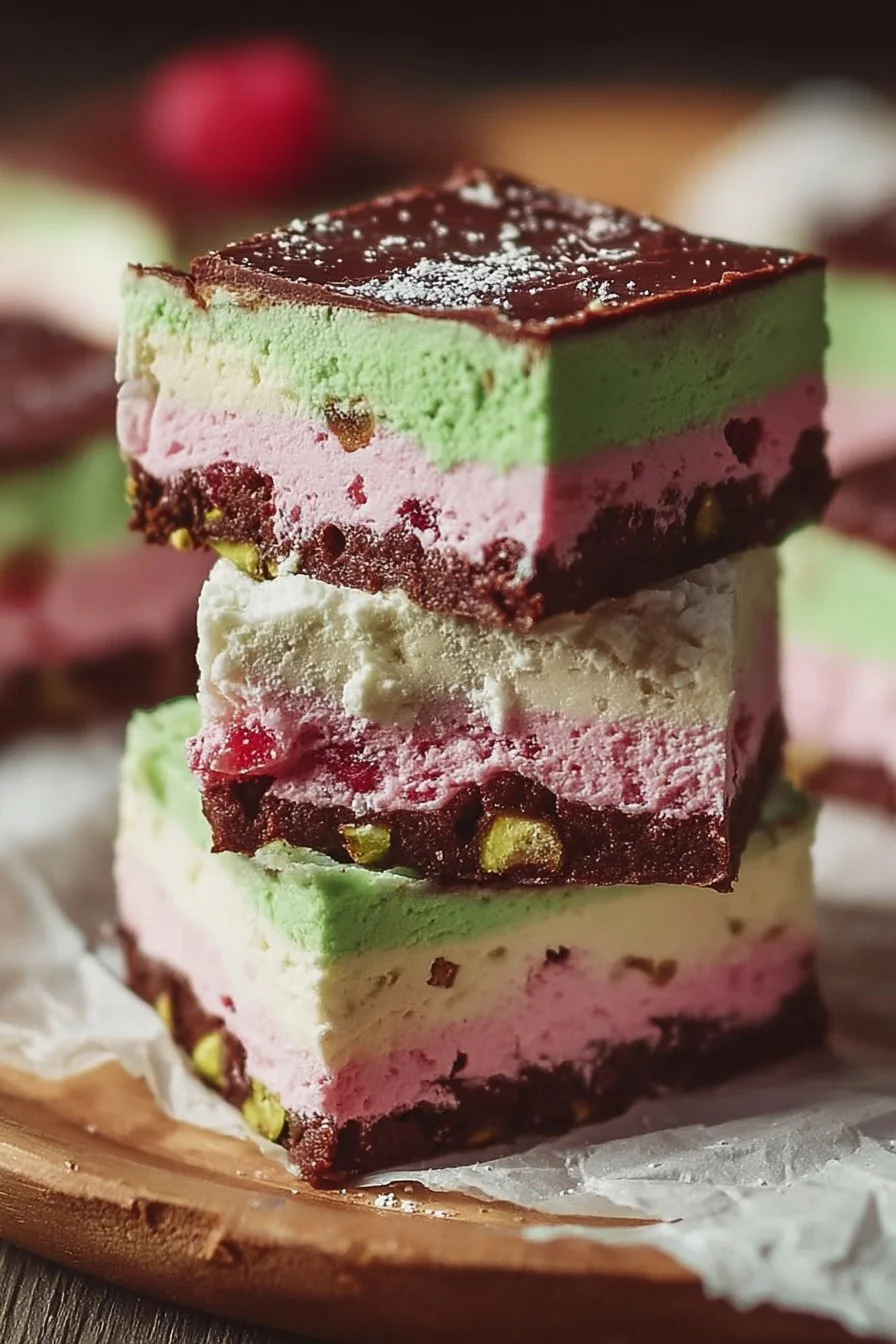
Introduction to Spumoni Bars
Growing up, summer meant ice cream, and nothing was more exciting than the colorful layers of Spumoni Bars. These delightful frozen treats are a nostalgic reminder of family gatherings and warm evenings spent outside. If you’re looking for a quick solution to satisfy your sweet tooth or impress your loved ones, you’ve found it! With layers of chocolate, pistachio, and cherry ice cream, Spumoni Bars are not just a dessert; they’re a celebration on a plate. Let’s dive into this easy recipe that will bring joy to your kitchen and smiles to your family!
Why You’ll Love This Spumoni Bars
Spumoni Bars are the ultimate dessert for anyone who craves a sweet treat without the fuss. They come together in just a few simple steps, making them perfect for busy weeknights or last-minute gatherings. The combination of rich chocolate, nutty pistachio, and fruity cherry creates a flavor explosion that’s hard to resist. Plus, they’re a hit with both kids and adults, ensuring everyone leaves the table happy!
Ingredients for Spumoni Bars
Creating Spumoni Bars is a delightful journey, and it all starts with the right ingredients. Here’s what you’ll need:
- Chocolate Ice Cream: The rich base layer that brings a deep, satisfying flavor. Choose your favorite brand for the best taste.
- Whipped Topping: This adds a light, creamy texture that balances the denser ice creams. You can use store-bought or homemade.
- Milk: Just a splash helps to blend the chocolate ice cream and whipped topping smoothly.
- Pistachio Ice Cream: This nutty layer adds a unique flavor and a pop of green color. If you’re feeling adventurous, try making your own!
- Chopped Pistachios: For garnish, these add a delightful crunch and enhance the pistachio flavor.
- Cherry Ice Cream: The fruity top layer that ties everything together with its sweet and tart notes.
- Maraschino Cherries: These are the cherry on top—literally! They add a fun, festive touch.
Feel free to customize your Spumoni Bars with different flavors or toppings based on your preferences. The exact quantities for each ingredient are listed at the bottom of the article for easy reference and printing.
How to Make Spumoni Bars
Making Spumoni Bars is a fun and straightforward process. With just a few steps, you’ll create a frozen dessert that’s sure to impress. Let’s get started!
Step 1: Prepare the Baking Dish
First things first, grab a 9×9-inch baking dish. Line it with parchment paper, letting the edges hang over the sides. This little trick makes it super easy to lift the bars out later. No one wants to wrestle with a sticky pan!
Step 2: Create the Chocolate Layer
In a mixing bowl, combine the softened chocolate ice cream, whipped topping, and a splash of milk. Stir until it’s smooth and creamy. This layer is the heart of your Spumoni Bars, so make sure it’s well mixed. Spread this chocolate goodness evenly into your prepared dish. Pop it in the freezer for about 30 minutes, or until it’s firm to the touch.
Step 3: Add the Pistachio Layer
Next up, it’s time for the pistachio layer! In another bowl, mix the softened pistachio ice cream with whipped topping until it’s well blended. This layer adds a nutty flavor that pairs perfectly with the chocolate. Carefully spread it over the chilled chocolate layer, smoothing it out evenly. Return the dish to the freezer for another 30 minutes to set.
Step 4: Finish with the Cherry Layer
Now, let’s bring it home with the cherry layer. Blend the cherry ice cream and whipped topping in a mixing bowl until combined. This layer is where the magic happens! Spread it over the pistachio layer, making sure it’s even. For a fun touch, top it with maraschino cherries and a sprinkle of chopped pistachios. It’s like a party on top!
Step 5: Freeze and Serve
Finally, it’s time to freeze your masterpiece. Cover the dish with plastic wrap and let it freeze for 4-6 hours, or until completely firm. Once it’s ready, lift the dessert out using the parchment paper. Cut it into bars and serve immediately. Get ready for the compliments to roll in!
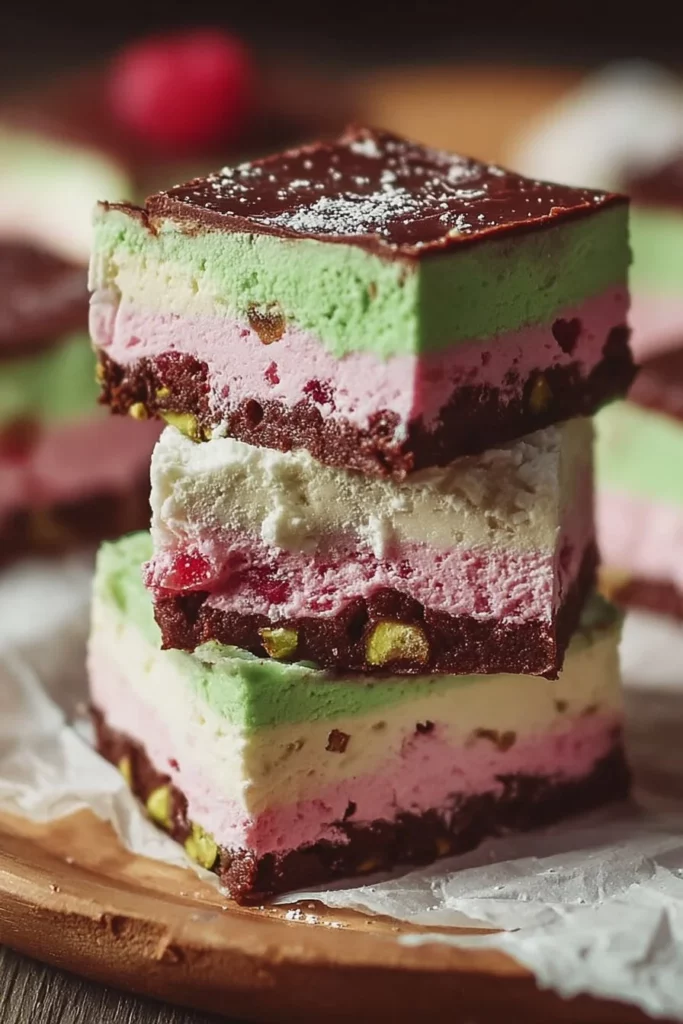
Tips for Success
- Make sure all ice creams are softened before mixing for easier blending.
- Use a spatula to smooth out each layer for a professional look.
- Freeze each layer thoroughly before adding the next to prevent mixing.
- Customize garnishes based on your taste—try crushed cookies or different nuts!
- Store leftovers in an airtight container to keep them fresh and delicious.
Equipment Needed
- 9×9-inch Baking Dish: Essential for shaping your Spumoni Bars. A similar-sized dish works too.
- Parchment Paper: Helps with easy removal. If you don’t have it, use plastic wrap.
- Mixing Bowls: A couple of medium-sized bowls will do the trick.
- Spatula: Perfect for spreading layers evenly. A spoon can work in a pinch.
Variations
- Fruit Swaps: Try swapping cherry ice cream for strawberry or raspberry for a different fruity twist.
- Nut-Free Option: Omit the pistachios and use almond or coconut ice cream for a nut-free version.
- Vegan Delight: Use dairy-free ice creams and whipped toppings to create a vegan-friendly treat.
- Chocolate Lovers: Add a layer of chocolate fudge or chocolate chips between the layers for an extra chocolatey experience.
- Seasonal Flavors: Experiment with seasonal ice creams like pumpkin or peppermint during the holidays for a festive touch.
Serving Suggestions
- Fresh Berries: Serve with a side of mixed berries for a refreshing contrast.
- Chocolate Sauce: Drizzle warm chocolate sauce over the bars for an indulgent touch.
- Mint Leaves: Garnish with fresh mint leaves for a pop of color and flavor.
- Ice Cream Cones: Serve in waffle cones for a fun, portable dessert option.
FAQs about Spumoni Bars
Curious about Spumoni Bars? You’re not alone! Here are some common questions I’ve encountered, along with answers to help you navigate this delicious dessert.
Can I make Spumoni Bars ahead of time?
Absolutely! In fact, they’re perfect for making ahead. Just freeze them for 4-6 hours, or overnight, and they’ll be ready when you are. This makes them a great option for parties or family gatherings.
What if I can’t find pistachio ice cream?
No worries! You can easily substitute it with another nut-flavored ice cream, like almond or hazelnut. Alternatively, you can use vanilla ice cream and add some crushed pistachios for that nutty flavor.
How do I store leftover Spumoni Bars?
Store any leftovers in an airtight container in the freezer. They’ll stay fresh for up to two weeks, but I doubt they’ll last that long!
Can I customize the flavors in Spumoni Bars?
Definitely! Feel free to mix and match your favorite ice cream flavors. Just keep the layering concept in mind, and you’ll create a unique dessert every time.
Are Spumoni Bars suitable for a vegetarian diet?
Yes! This recipe is vegetarian-friendly, as it uses ice creams and toppings that don’t contain meat or animal by-products. Just check the labels to ensure they meet your dietary needs.
Final Thoughts
Creating Spumoni Bars is more than just making a dessert; it’s about crafting memories. Each layer tells a story, from the rich chocolate to the nutty pistachio and the sweet cherry. As you slice into these colorful bars, you’ll see smiles light up around the table. They’re perfect for any occasion, whether it’s a summer barbecue or a cozy family night in. Plus, the joy of sharing something homemade adds a special touch. So, roll up your sleeves, gather your loved ones, and dive into this delightful treat that’s sure to become a family favorite!
Print
Spumoni Bars: Discover This Irresistible Ice Cream Delight!
- Total Time: 5-6 hours
- Yield: 12 bars 1x
- Diet: Vegetarian
Description
Spumoni Bars are a delightful frozen dessert featuring layers of chocolate, pistachio, and cherry ice cream, garnished with whipped topping and nuts.
Ingredients
- 1 ½ cups chocolate ice cream, softened
- 1 cup whipped topping
- 1 tablespoon milk
- 1 ½ cups pistachio ice cream, softened
- 1 tablespoon chopped pistachios, for garnish
- 1 ½ cups cherry ice cream, softened
- 1 tablespoon maraschino cherries, for garnish
Instructions
- Line a 9×9-inch baking dish with parchment paper, letting the edges hang over for easy removal.
- In a bowl, mix the softened chocolate ice cream, whipped topping, and milk until smooth. Spread evenly into the prepared dish. Place in the freezer for about 30 minutes, or until firm.
- In another bowl, combine the softened pistachio ice cream and whipped topping. Spread this mixture over the chocolate layer, smoothing it out evenly. Return to the freezer for another 30 minutes.
- In a mixing bowl, blend the cherry ice cream and whipped topping until well combined. Spread this layer over the pistachio mixture. Top with maraschino cherries and chopped pistachios for garnish.
- Freeze for 4-6 hours or until completely firm.
- Once fully frozen, lift the dessert from the baking dish using the parchment paper. Cut into bars and serve immediately.
Notes
- Ensure all ice creams are softened for easier mixing.
- Feel free to customize the garnishes based on your preference.
- Store any leftovers in an airtight container in the freezer.
- Prep Time: 15 minutes
- Cook Time: 0 minutes
- Category: Dessert
- Method: Freezing
- Cuisine: Italian
Nutrition
- Serving Size: 1 bar
- Calories: 200
- Sugar: 18g
- Sodium: 90mg
- Fat: 10g
- Saturated Fat: 5g
- Unsaturated Fat: 3g
- Trans Fat: 0g
- Carbohydrates: 25g
- Fiber: 1g
- Protein: 3g
- Cholesterol: 30mg
Keywords: Spumoni Bars, Ice Cream Dessert, Frozen Dessert, Italian Dessert
